
How to Remove a Fire Alarm Cover safely: first, isolate power by switching off the circuit and removing the batteries. Then gather insulated tools, a voltage tester, a ladder, safety glasses, and a dust mask. Identify the model and mounting type twist, bayonet, snap, hinge, or tamper-proof then support the unit and use the correct motion (counterclockwise twist, quarter-turn release, or clip depression) while avoiding excessive force. Follow precautions to prevent false alarms or damage, and continue with the guidance for detailed steps and troubleshooting.
Key Takeaways
- Cut power at the breaker and remove batteries, then verify de-energized with a voltage tester before starting.
- Wear safety glasses, a dust mask, insulated gloves, and secure a stable ladder with a spotter for ceiling units.
- Identify the model and mounting type (twist-off, bayonet, screw, snap-on, or tamper-proof) to choose the correct removal method.
- Use insulated screwdrivers or a non-marring pry tool, support the cover/detector, and rotate or depress tabs per the mounting type.
- If the cover is stuck or complex wiring/tamper locks exist, stop and contact a qualified technician to avoid system damage.
Table of Contents
Quick Answer: How to Remove a Fire Alarm Cover Safely
Handle the task cautiously: before attempting to remove a fire alarm cover, cut power to the circuit at the breaker or remove the unit’s battery to prevent shocks and accidental alarms. The simplest safe method involves confirming power is off, then examining the cover for tabs, screws, or a twist-lock mechanism. If screws are present, use the correct screwdriver; if tabs secure the cover, press or depress them gently while pulling the cover away. Check How To Turn Off Fire Alarm.
For twist-lock designs, rotate counterclockwise until the cover releases. Support the unit as the cover frees to avoid strain on the mounting bracket or wiring. Once removed, set the cover aside on a clean surface and avoid touching internal sensor elements. If resistance occurs, stop and reassess fastening points rather than forcing removal. After completing the necessary non-invasive tasks, restore power or reinstall the battery, then verify normal operation by observing the unit’s status indicator.
When You Should Remove a Fire Alarm Cover (Batteries, Cleaning, Repairs)
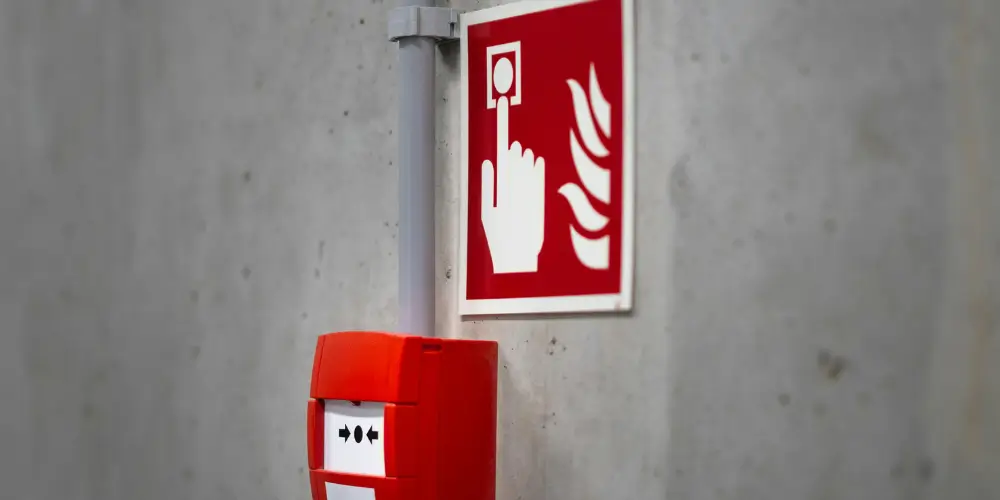
After confirming the power is off and the cover is safely removed, homeowners and technicians should remove a fire alarm cover only for specific, necessary tasks: replacing batteries, performing routine cleaning to remove dust or insect debris that can impair sensors, or accessing internal components for minor repairs and diagnostics. Removal is justified when a unit shows low-battery alerts, intermittent false alarms, or visible contamination inside the sensing chamber. Routine inspection intervals (e.g., every 6–12 months) guide cleaning frequency; excessively frequent opening risks damage or misalignment.
Minor repairs might include reseating connectors, replacing a battery holder, or inspecting the circuit board for obvious corrosion; anything beyond these simple actions should prompt professional service. Documentation of what was done, parts used, and the date of intervention helps track maintenance. If uncertainty exists about a fault’s cause or the scope of repair, consult a qualified technician rather than performing invasive work that could compromise the alarm’s function.
- Replace batteries when low-battery chirps occur.
- Clean sensors during scheduled inspections
- Access for simple diagnostics or component reseating
Safety First: Tools, How to Silence the Alarm, and Precautions
Gather the necessary tools and take deliberate steps to silence and secure the alarm before opening it: a non-contact voltage tester or multimeter to confirm power is off, a soft brush and compressed air for cleaning, insulated screwdrivers sized for the device, and replacement batteries or parts if needed. The first priority is to eliminate power and false activation: isolate mains power at the circuit or breaker for hardwired units, and remove the battery for battery-powered alarms. Verify that there is no voltage with the tester before touching any wiring. Silence persistent chirps by replacing batteries only after confirming the power state. Wear safety glasses and a dust mask to avoid inhaling debris.
Work on a stable ladder with a spotter when reaching ceiling-mounted alarms. Avoid using metal tools near live terminals and do not force plastic clips; consult the manufacturer’s basic instructions if resistance is encountered. Maintain a clear work area and have a phone available for emergencies. If uncertainty exists about wiring or power, stop and contact a qualified electrician or the alarm manufacturer for guidance.
Check Your Alarm and Mount Type Before You Start
Before attempting removal, identify the alarm model and how it is mounted to validate the correct approach and tools. The homeowner should read the label or open the manufacturer’s website for model-specific instructions and check whether the unit is hardwired, battery-powered, or part of an interconnected system. Visual inspection reveals mounting types twist-off bezel, bayonet, screw-fixed bracket, or recessed housing and determines if special keys or tools are required. Verifying power status and noting any nearby wiring or sensors reduces risk and prevents damage.
- Note the model number and power type to match the correct removal procedure.
- Observe mounting hardware and whether covers snap, twist, or unscrew from the base.
- Check for labels, tamper clips, or locking mechanisms that require a key or release tool.
Documenting these details before touching the unit validates a targeted, safe removal and avoids common mistakes that lead to broken covers or triggered alerts.
Remove Twist‑Off and Bayonet Fire Alarm Covers
Begin by confirming the alarm is de‑energised and the model matches a twist‑off or bayonet style. The technician or homeowner should locate any alignment marks or tabs indicating twist direction. For twist‑off covers, grip the housing firmly, apply steady counterclockwise rotation, and avoid jerking; the cover will unscrew from threaded slots. If resistance is high, inspect for a locking ring or retaining screw and remove it first. For bayonet‑style covers, identify the bayonet lugs and depress any release tab while turning a short distance (usually a quarter turn) to free the cover from the mount. Once loosened, lower the cover gently to avoid stressing wires or internal components. Keep small parts, such as screws or springs, in a container. Visualise the reinstallation orientation before removal to verify correct alignment later. If any component seems corroded or damaged, stop and consult the manufacturer or a qualified technician.
Remove Snap‑On, Hinged, and Tamper‑Proof Fire Alarm Covers
Remove snap‑on, hinged, and tamper‑proof covers by first confirming power is isolated and noting the cover type and any visible release mechanisms. The technician assesses each cover: snap‑on lids require inward pressure at clips, hinged covers pivot from a defined axis, and tamper‑proof designs hide fasteners beneath security caps or require special tools. Visual inspection determines tool choice and safe hand placement to avoid stressing the housing or wiring.
- Identify clip locations, hinge pins, or security caps before applying force.
- Use appropriate non‑conductive tools and a small screwdriver or key for tamper devices.
- Support the base while releasing the cover to prevent tension on wiring.
For snap‑on covers, depress clips evenly; for hinged models, open slowly to clear any catches; for tamper‑proof variants, remove security caps or rotate access keys as specified by the manufacturer. After removal, set covers on a soft surface and proceed to the next maintenance step.
Avoid False Alarms and Prevent Damage During Removal
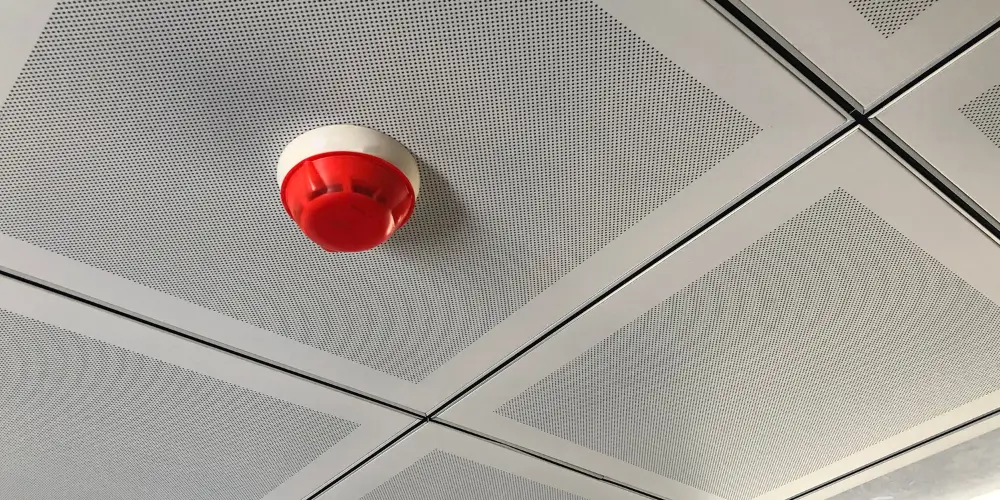
Take precautions to prevent inadvertent alarm activation and equipment damage by de‑energizing circuits, isolating the device from the building’s fire system per local procedures, and keeping in communication with building security or the monitoring service. Before removal, verify isolation by checking control panel status and confirming with monitoring personnel to avoid false dispatches. Use insulated tools and wear appropriate PPE to reduce the risk of short circuits and static discharge. Support the cover and detector to prevent drops that could harm sensors or housings. Handle optical components, sensing chambers, and printed circuit boards by their edges; avoid touching sensing surfaces or using cleaners that leave residues. When disconnecting wiring, label terminals and use proper connectors to maintain polarity and circuit integrity during reinstallation. Inspect the mounting base and gaskets for damage; replace compromised parts to preserve sealing and sensitivity. After reassembly, restore power and run an operational test per manufacturer instructions to confirm normal function and verify no faults remain.
Troubleshooting Stuck Covers and When to Call a Professional
If a cover refuses to budge despite following isolation and support procedures, simple troubleshooting steps can often resolve the issue before calling a technician. The detached observer should first verify that power and alarm circuits are fully isolated and that any locking tabs, screws, or paint seals are identified. Gentle incremental techniques rocking the cover, applying a thin flat tool in a gap, or warming the area with a hairdryer to soften paint may free minor adhesion without damage. If resistance persists, reassess for hidden fasteners, corrosion, or tamper mechanisms.
- Inspect for screws, clips, or paint bridges obscured by finish or dust.
- Use a non-marring pry tool and gradual motion to avoid cracking plastic or bending mounts.
- Consider environmental factors like rusted brackets or swollen components from moisture.
A professional should be engaged when wiring is complex, covers are integral to detectors, corrosion is extensive, or the unit shows damage; this minimises risk to system integrity and safety.
Frequently Asked Questions
Can Removing the Cover Void My Home Insurance or Warranty?
Yes. The homeowner risks voiding warranty or insurance coverage if tampering is against policy terms or causes damage. Insurers and manufacturers typically require certified maintenance; unauthorised removal could be deemed negligence, affecting claims or warranty validity.
Can I Remove a Cover on a Hardwired Interconnected Alarm?
Yes, they can remove it, but only after shutting off the circuit breaker and ensuring power is isolated. A qualified electrician or installer is recommended to avoid triggering interconnected units, voiding warranties, or creating safety hazards.
Are There Legal Rules for Who Can Remove Alarms in Rental Properties?
Yes. Laws typically require landlords or qualified technicians to handle alarm removal, often prohibiting tenants from disabling devices; regulations and required qualifications vary by jurisdiction, and compliance with local building and fire codes and lease terms is mandatory.
Can Pets Trigger the Alarm During Removal, and How to Manage Them?
Yes, pets can trigger alarms during removal. They should be secured away from the work area, kenneled, distracted with familiar toys or treats, and owners should silence alarms per instructions, minimising noise and sudden movements to reduce false triggers.
How Do I Dispose of or Recycle an Old Fire Alarm Cover?
They should check local regulations, since plastic covers often go with household recycling, while electronic or metal components require e-waste or scrap disposal; if unknown, they’ll take it to a municipal hazardous-waste or e-waste drop-off for proper recycling.
Conclusion
Removing a fire alarm cover should be approached calmly and methodically. The person follows safety precautions, silences the unit, and uses appropriate tools while confirming the alarm and mount type. They perform the correct removal method: twist, bayonet, snap, hinge, or tamper‑proof, taking care to avoid false alarms and damage. If the cover resists or wiring appears compromised, the person stops and seeks professional help to guarantee continued safety and code compliance.