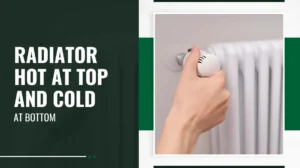
A radiator hot at top and cold at bottom usually indicates poor circulation, often caused by trapped air, sludge buildup, or unbalanced flow. Air tends to create a sharp temperature split and may produce gurgling, while sludge usually leaves the lower section stubbornly cold. Boiler pressure should be around 1–1.5 bar when cold, and both the TRV and lockshield valves should be open and working. Further steps clarify the exact cause.
Key Takeaways
- A hot top and cold bottom radiator usually means poor circulation, so heat isn’t reaching the lower panels efficiently.
- If the top corner stays cool or you hear hissing/gurgling, trapped air is likely; bleed the radiator when it’s cool.
- If the top is warm but the whole bottom stays cold, sludge buildup is likely; flushing or a chemical clean may be needed.
- Check the boiler pressure is about 1–1.5 bar cold, and ensure the TRV and lockshield valves are fully open and working.
- If problems persist, system balancing, pump checks, or investigating pipe/valve restrictions may require a heating professional.
Table of Contents
Hot Top, Cold Bottom Radiator: What It Means
Why does a radiator feel hot at the top but remain cold at the bottom? This temperature split usually signals that heat is entering the radiator but is not circulating evenly through its full height.
In a typical water-filled central-heating system, hot water arrives near the top, gives up heat to the metal, then continues downward and returns to the boiler. When the lower section stays cool, the radiator delivers only partial output, so the room may take longer to warm and the boiler may run longer than expected. At this stage, a boiler inspection and diagnostic check may be needed.
A consistent hot-top/cold-bottom pattern points to an obstruction to flow or heat transfer inside the radiator or its connecting pipework, or to an imbalance that favours other radiators. It can also reflect low overall system circulation. The key meaning is reduced heat delivery, not a “normal” operating state.
Air or Sludge? A 60-Second Diagnosis
A hot-top/cold-bottom radiator typically comes down to two common culprits: trapped air or sludge buildup. The fix depends on telling them apart quickly. A simple 60-second check relies on sound, feel, and pattern. Air usually shows as a sharp temperature split: the top corner near the bleed point may stay cool while the other top areas warm, and the radiator can gurgle or hiss as water struggles to displace pockets.
Tapping the upper section may sound hollow compared with the lower, water-filled area. Sludge tends to create a broader cold zone across the entire bottom, sometimes with lukewarm middle sections.
The radiator often feels heavy and uniformly warm at the top but stubbornly cold along the lower panels. There is rarely gurgling; instead, heat arrives slowly.
This quick distinction guides whether bleeding or cleaning is likely needed next.
Quick Checks: Pressure, Valves, and TRV Settings
Before assuming bleeding or flushing is required, several fast system checks can confirm whether heat is being blocked upstream: radiator hot at top and cold at bottom, boiler pressure should sit in the normal cold range (typically around 1–1.5 bar), the lockshield and TRV valves must be fully open and free to move, and the TRV setting should be high enough to call for heat while ensuring its pin is not stuck down. Further check: What Should A Boiler Pressure Be: Understanding Ideal Levels for Optimal Performance
If pressure is low, circulation can weaken, and the radiator may warm only near the inlet; topping up via the filling loop (per manufacturer guidance) restores flow.
Next, confirm both radiator valves are actually open: lockshields are often left partially closed after balancing, and TRV heads can be set low or fitted incorrectly.
With the heating on, the TRV should respond to a higher setting and open the valve body. A stuck pin or seized spindle can restrict flow and mimic internal blockage.
Bleed Trapped Air (and Confirm It’s Fixed)
Many radiator cold-spot complaints stem from trapped air at the top, which prevents hot water from circulating fully. Bleeding releases the air so water can fill the radiator’s upper channels.
The heating should be off and the radiator cool to reduce the risk of scalding and pressure surges. A bleed key (or flat screwdriver on some vents) is turned slowly until a hiss is heard; the vent is kept slightly open until water flows in a steady stream, then closed firmly but not overtightened. A cloth and a small container help catch drips.
After bleeding, system pressure is checked at the boiler gauge; if it has dropped, it is topped up to the manufacturer’s recommended range.
The heating is then restarted, and the radiator is observed: it should warm more evenly from top to bottom within several minutes, and gurgling noises should stop.
Radiator Sludge Buildup: Signs and Causes
Even after trapped air has been bled and pressure restored, uneven radiator heat can persist when sludge restricts water flow through the lower channels. This sludge is typically a mix of corrosion products, limescale, and magnetite (black iron oxide) that settles where velocity is lowest, starving the bottom of hot water.
Common signs include a radiator that warms quickly at the top but stays cold at the bottom, radiators that take longer to heat overall, and a frequent need to rebalance the system. Discoloured water during bleeding, gritty particles in valve strainers, or a noisy boiler as it circulates can also point to contamination.
Several causes contribute: oxygen entering through small leaks or frequent refilling accelerates corrosion; incompatible metals in the system encourage galvanic reactions; hard water promotes scale; and poor circulation allows debris to accumulate. Over time, deposits narrow internal passages and reduce heat transfer efficiency.
Flush the Radiator to Clear Sludge Safely
Flush the radiator to dislodge settled magnetite and scale and restore proper water circulation through the lower sections. Begin by turning off the boiler, allowing the system to cool, and closing both radiator valves. Place towels and a shallow tray beneath the valve union to catch water. Loosen the union carefully, then move the radiator slightly to access the drain point or remove it for outdoor flushing if feasible.
Open the bleed valve to admit air, then drain into a container until the flow slows and the dark water clears. For stubborn sludge, attach a hose to the tail and flush alternately through each end, using moderate pressure to avoid damaging older fittings. A mild radiator-cleaning chemical may be used according to the manufacturer’s directions, followed by repeated rinsing.
Refit all joints, reopen valves, refill, bleed trapped air, and check for leaks.

Balance the Heating to Stop Cold Spots
When some radiators heat quickly while others stay lukewarm or develop cold patches, the system often needs balancing to distribute hot water more evenly across all circuits. Balancing adjusts each radiator’s lockshield valve so flow is shared rather than rushing through the nearest units and starving those farther away.
A practical approach starts with turning the heating on, opening all thermostatic radiator valves fully, and letting temperatures stabilise. Each lockshield is then set from fully closed by opening a small, measured amount. Radiator hot at top and cold at bottom. Radiators that heat first are slightly restricted, while slower radiators are opened a little more, aiming for a modest, consistent temperature drop between the flow and return pipe at each unit. Small changes matter; after every adjustment, time is allowed for the effect to settle before rechecking
When balanced, radiators warm more uniformly, cold spots are reduced, and overall comfort improves without raising the thermostat.
When Valves, Pipes, or Pumps Need an Engineer
Balancing resolves many uneven-heating problems, but persistent cold radiators can point to a failing valve, a restricted pipe run, or inadequate pump performance. When these components are involved, an engineer or a qualified heating professional may be needed to safely and accurately diagnose flow limitations.
- Stuck or undersized valves: A seized TRV pin, clogged lockshield, or incorrect valve type can throttle flow and keep the radiator cool at the bottom.
- Hidden pipe restrictions: Sludge, crushed microbore, trapped air at high points, or poor pipe routing can reduce circulation beyond simple bleeding.
- Pump and system head: An ageing pump, wrong speed setting, or excessive resistance from added radiators can prevent adequate flow through distant emitters.
- Control or layout issues: Bypass valves, zone valves, and incorrect pipework (series loops) can create short-circuiting and uneven temperatures.
Professional testing (temperature drop, differential pressure, and flow checks) avoids guesswork.
Frequently Asked Questions
Can a Cold-Bottom Radiator Increase My Gas or Electricity Bills?
Yes, it can raise energy bills by delivering less heat for the same runtime of the boiler or heat pump. The system may run longer to reach set temperatures, wasting energy and increasing gas or electricity costs.
Is It Safe to Use Chemical Inhibitors or Cleaners in My Heating System?
Chemical inhibitors or cleaners are generally safe when correctly selected, dosed, and flushed per manufacturer guidance. They should be compatible with system metals and seals. Misuse can cause corrosion, leaks, or pump issues; professional advice helps.
How Often Should I Schedule a Full System Powerflush?
A full system powerflush is typically scheduled every 5–10 years, or sooner if heating performance declines, sludge is confirmed, or new components are fitted. Annual servicing and inhibitor checks can reduce the needed frequency.
Could a Smart Thermostat or Zoning System Cause Uneven Radiator Temperatures?
Yes, it can. Smart thermostats and zoning may reduce flow or close valves, leaving some radiators partially heated. However, persistent uneven temperatures usually indicate air in the system, sludge, balancing issues, or low pump performance.
Does Radiator Size or Placement Affect Top-Hot, Bottom-Cold Symptoms?
Radiator size or placement rarely causes this directly, though undersized units or poor airflow can worsen perceived performance. Symptoms more often reflect flow, air, or sludge issues; placement near valves and pipe runs affects balancing.
Conclusion
A radiator hot at top and cold at bottom typically indicates trapped air or sludge restricting circulation. Quick checks of system pressure, valve positions, and TRV settings can rule out simple causes. Bleeding may restore full heat if air is present; persistent cold spots point to sediment that needs flushing and inhibitor treatment. Balancing radiators can improve flow across the system. If problems remain, an engineer should inspect valves, pipework, or pumps.